I made this set of 3 cards a few weeks ago but didn't get around to blogging them - mainly because I planned to make another 3 but in pink, which I've yet to do :( for a wee gift set.
Anyway, I was inspired by a cameo necklace that my mother had...
I've heat embossed one of each of the Hero Arts - Three Silhouettes LP195 onto patterned kanban card with detail white embossing powder then layered them up using nesties ovals and scallop ovals. And of course I just had to use my favourite thing - corrugated kraft card, and some blue grosgrain ribbon.
Nice and quick - just need to do the pink ones to make up the set now
Can you believe it's the last day of February already? obviously 2011 is gonna fly by!
I have some exciting news - come back tomorrow to find out what
And don't forget to enter the Promarker Blending Pairs Competition - closes today
Monday, 28 February 2011
Sunday, 27 February 2011
Promarker backgrounds
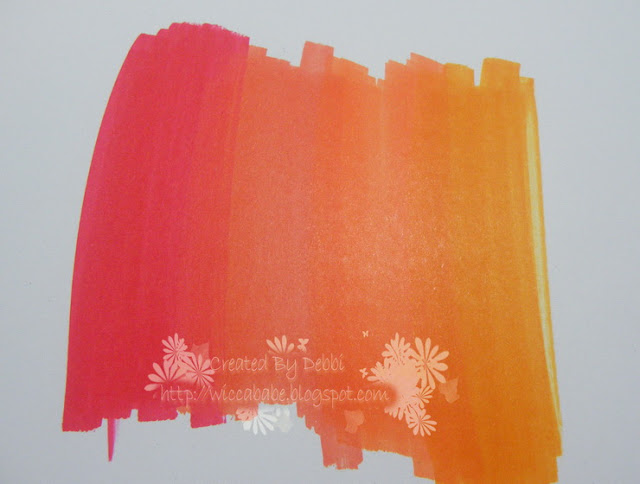
Here's another couple of cards that I made with another of the techniques I was showing off last week, these ones are really quick and easy to do.
Click here for the technique.
For both I made the coloured background with promarkers then stamped the Hero Arts - Flower Bird Garden CG270 and heat embossed. I used the MS Crackle PATP punch for the edges of the corrugated kraft card mat and plain black card.
Super quick and easy cards, but I think they're quite effective.
And don't forget to enter the Promarker Blending Pairs Competition - closes on Monday
I'd like to enter these in..
Stamptacular Sunday - You've Been Framed
Colour Create - Kiwi, Banana & Papaya for the top card and Cherry, Orange and Pineapple for the bottom card
Saturday, 26 February 2011
Angel Crafts DT - Feb ribbon kit
Yay. it's the weekend! I'm dying to hear from Kath about her day with Tim Holtz yesterday - she's been counting down the days since there were 158 of them, and now it's all over! I was so excited for her that you would've thought I was going.
Anyway, I was on a mission the other day to get a load of stuff done so that I can get some samples done for my next demo and I got cracking with the February ribbon kit from Angel Crafts - it's a bumper black and white ribbon kit.
There are so many goodies in this kit it's hard to know where to start, but I jumped in and got going and these are the things I've come up with so far...
I've been searching all over the internet for this die, and accidentally stumbled across it in The Glitter Pot sale no less, so not only was it the last one in stock but it was less than half price - yay!
I used the Flower Stems clear stamps from Autumn Leaves and the 1/8" wide black with white dots ribbon from Berisfords from the kit
Next up is a butterfly card - I coloured some core'dinations card with promarkers before using a Marianne D Creatables die to make the butterfly.
I used black & white Grosgrain stripe/stitch from May Arts, black Grosgrain with white edged stitching from May Arts, black with white circles grosgrain from May Arts, black and white squares/stitched from May Arts, Lush Black rhinestones from MME which are all from the kit.
The greeting is from Craftwork Cards.
Back tomorrow with some Hero Arts cards
And don't forget to enter the Promarker Blending Pairs Competition - closes on Monday
Friday, 25 February 2011
Promarkers on Plastic - Pt 2
Back again with part 2 of the promarkers on plastic - now when I chose the colours for this one I was thinking "boys card", lovely bright primary colours (yes I know green is a secondary colour) but it turned into something completely different once I got in full flow yesterday afternoon...
The butterflies are from the Hero Arts - Antique Engravings CL383 set, coloured with promarker, the swirl is a Tim Holtz Alterations die - Elegant Flourishes (which my buddy Kath cut for me from white card and I coloured it with black promarker) This was all added to the promarker on plastic panel that I made the other day (click here to see how I made it) which I stuck down onto the corrugated kraft card from Simply Create and yellow core'dinations card.
I'd like to enter it into...
Flutter By Wednesday - open
I ♥ ProMarkers - stitching
Crafty Creations - at the bottom of my garden... lives
Crafty Cardmakers Spotlight - plastic
This is so totally different to what I usually create, but I really like it - don't be shy though, tell me what you think - I won't be offended :)
Tomorrow I'll be back with a DT project for Angel Crafts - you really must get your hands on Angela's ribbon kits, they are such good value and there's loads of goodies besides ribbons.
And don't forget to enter the Promarker Blending Pairs Competition - closes on Monday
Thursday, 24 February 2011
Promarkers on Plastic - Pt 1
Hi, there and I'm back with one project I've done with the promarkers on plastic.
Click here to see what I did to the plastic
core'dinations card, Bo Bunny double dot cardstock for the die cut corners (Marianne D Creatables), the brads were also coloured with promarkers
Wednesday, 23 February 2011
Promarkers on Canvas
Firstly I'd just like to thank all of you who have left such nice comments over the last few days, where I've been showing you some different ways to use your promarkers. Some of you have asked what I'm going to do with the different things I've produced, so over the next few days I'll be showing you what I've done with each of the techniques I've shown you.
First up is this gorgeous wee boy on canvas
Click here for the post telling you about the technique.
Image: Number 1 Fan from Sugar Nellie, I've stamped him with Memento ink onto Claudine Hellmuth's sticky backed canvas then coloured him with the following promarkers...
skin: Sunkissed Pink, Blush and Ivory. top and eyes: Bluebell and Prussian. trousers: Mandarin, Pumpkin and Gold, Hair: Cocoa, Cinnamon and Tan. Ground: WG1 and 3
papers are all Kaisercraft - Rewind from Merly Impressions, black core'dinations cardstock and a Craftwork Cards sentiment
Next up is the flowers that I airbrushed with the Letrajet and overstamped...
Click here for the post with the technique info
I airbrushed the sticky backed canvas with the Letrajet system and Purple, Mulberry and Orchid promarkers, then sprinkled a little blending solution over it. I then stamped Hero Arts - Stencil Flower CG194 twice with Memento ink onto the now coloured canvas. I used the Purple promarker to accent the edges of the petals and the centre of the flower - remember you need to have a very light touch or the colour bleeds like nobody's business. Then I cut out one of the flowers, and just the middle petals of the second flower. I layered up the flowers by using 3d foam tape on the outside of the flowers and just double sided tape on the centres.
For the rest of the card I stamped Hero Arts - Thank You Definition CG268 with Versamark onto plain white card and heat embossed with clear embossing powder. Then used my blending tools to colour the card with Spun Sugar and Dusty Concord Distress Inks. I inked up the Hero Arts - Fabulous Flourish S5449 with Worn Lipstick and Dusty Concord Distress Inks and stamped over the background. I added some lace and then my canvas flower. To finish off the flower I covered the centre with Glossy Accents and then covered it with pink microbeads.
I'll be back tomorrow with some more examples of how I've used the techniques I've been showing you.
I would like to enter my boy card into...
Passion for Promarkers - One for the Boys
Stamp Something - Something Funky
Crafty Catz - One for the Men
and I'd like to enter my flower card into...
Allsorts Challenge - Inspired by Nature
Tuesday, 22 February 2011
More Cool things with Promarkers
I'm enjoying doing all these cool things with my promarkers, and the girls seem to be enjoying it too because every time I try to do something they are right at my elbows lol
So here's another couple of ideas for you...
I have coloured a decent sized area of cardstock by blending some colours, I think I used Poppy, Bright Orange, Mandarin and Pumpkin for this one, using the broad (chisel) nib...
Then I made my own little inkpad with some Cut n Dry and covered it with blending solution
Then I "inked up" the Hero Arts - Canvas Stripes CG196 with my blending solution inkpad...
And stamped it over the promarker background...
So have a play with different stamps and you don't just have to stick to background stamps either.
After I finished with that technique I thought it might be pretty if I used the plain coloured promarker background with some of my other Hero Arts stamps, and this is what I came up with...
I used Grass, Bright Green, Lime Green, Yellow, Gold and Pumpkin promarkers and Hero Arts - Flower Bird Garden CG270
I'd love to see how you are all getting on, so if you've been trying any of these techniques or any different ones then leave me a comment and I'll pop over and see them on your blog
Monday, 21 February 2011
Recycling and Promarkers
I thought I'd give you a quick step-by-step for the recycling item from my last post. Now I can't claim the idea as my own, it was the most fabulous Tim Holtz who mentioned the recycling of his grungeboard and embossing folders packaging on one of his 12 Tags of Xmas from 2010 and I just think it's a fab way of using up the packaging and not sending it to landfill - I like to do my wee bit.
Anyway, here goes...
First you take the packaging from some of your craft supplies - well this was a blooming good excuse for me to go buy another embossing folder :)
To make life a bit easier I trim off the excess, leaving the main flat area - but I leave on the wee shallow walls just in case I get a bit too excited with the blending solution later (oh you have no idea lol)
Here's the selection of promarkers I'll be using, but the trick here is to experiment - you can get great results with just one promarker colour
I've just scribbled randomly with the chisel tip of each of the colours
And here, I've sprinkled on some blending solution
I left it to dry for an hour and then ran it through my cuttlebug with an embossing folder (as I mentioned in my last post, I slipped in a thin piece of cardstock between the inked side of the plastic and the folder so as not to mark or stain the folder) I then stitched the plastic to the cardstock and it's ready to use on my card or project...
(I accidentally put my plastic/paper sandwich into the embossing folder the wrong way up, so have ended with a debossed instead of embossed piece, but I kind of like it like that )
Friday, 18 February 2011
What else can I do with Promarkers??
You all know by now that I love stamping, particularly using stamps from a wee Scottish company called Sugar Nellie, and of course I like to colour them with my promarkers and this is what I teach and demonstrate.
But there is so much more that you can do with your promarkers, they are not just for colouring stamps on cardstock - because I'm well aware that not everyone wants to do that.
Most of you will already be able to do the basics, like colouring ribbons, bling and pearls to match your project - if you haven't tried it already then give it a go - just use the broad nib of the promarkers to colour them and the best advice I can give you is to experiment. I've tried all kinds of organza, grosgrain, twill, ricrac, satin, lace - even patterned ribbons can look quite funky with a bit of promarker colouring. Clear bling and pale pearls can also be coloured with your promarkers - for deeper darker colours leave each coat of colour to dry in between. Why not try other embellishments like brads, fabric and paper flowers, buttons etc. So you will always have embellishments to match your project.
So here are a couple of fun things you can also use your promarkers for...
at one of my classes last Saturday I was asked how well promarkers work on fabric, well I've tried out a couple of things here. Firstly I stamped directly onto Claudine Hellmuth's sticky backed canvas and coloured in the image - now you can't be heavy handed with this and the best technique seems to be to lightly touch the nib to the fabric and remove the nib pretty quickly, the longer the nib is in contact with the fabric, the more it will bleed. Also, you can forget the blending methods that I usually use, so it's a good idea to give some thought to where you want your darker and lighter areas and just how dark or light you want those areas to be.
Image: Number 1 Fan from Sugar Nellie, I've stamped him with Memento ink onto Claudine Hellmuth's sticky backed canvas then coloured him with the following promarkers...
skin: Sunkissed Pink, Blush and Ivory. top and eyes: Bluebell and Prussian. trousers: Mandarin, Pumpkin and Gold, Hair: Cocoa, Cinnamon and Tan. Ground: WG1 and 3
Next up is another fabric idea, this time I airbrushed the sticky backed canvas with the Letrajet system and Purple, Mulberry and Orchid promarkers, then sprinkled a little blending solution over it.
I then stamped Hero Arts - Stencil Flower CG194 twice with Memento ink onto the now coloured canvas. I used the Purple promarker to accent the edges of the petals and the centre of the flower - remember you need to have a very light touch or the colour bleeds like nobody's business. Then I cut out one of the flowers, and just the middle petals of the second flower.
And the last one I'm going to show you today features a bit of recycling. I know a lot of you are fans of Tim Holts and you may recognise this technique from one of his 12 Tags of Xmas last year. I bought a new embossing folder on Saturday and kept the plastic front of the packaging.
I cut part of the packaging away so I was left with just the recessed area and the short walls (this saves any excess blending solution from running off and messing anything up that you have lying around.)
I then took Aubergine, Purple, Mulberry and Orchid promarkers and randomly scribbled all over the inside of the plastic packaging, once I'd done that I sprinkled some blending solution over it. This is another technique where there is no right and wrong way of doing it, you can use just a wee amount of solution or if you do use a little more you can always tip the plastic tray around for another fun effect.
Leave this to dry. Trim off the walls of your tray so that you are left with a flat piece of plastic. So that you don't mark the inside of your embossing folders I've found it's best to cut a sheet of paper or very thin card to the same size as your plastic and place it between the inked side of the plastic and the inside of the embossing folder.
Run the embossing folder with plastic and paper through your die-cutting machine and voila.....
Now I'm going to try and show you over the next few days what I'm going to do with these projects hopefully, so remember to check back.
In the meantime, remember to enter the Letraset Blending Pairs competition, and Enfys is also running a wee competition in conjunction with Letraset for the blending sets too.
Thursday, 17 February 2011
Sneaky Peeks
Just a couple of sneaky peeks today because I am up to my elbows in stuff! I have about 15 different projects on and around my desk at the moment in various stages of completion.
I am often asked what else can you do with promarkers besides colouring in stamps, because colouring in stamps aren't everyone's cup of tea.
So I'll be back soon to show you some more of this....
I am often asked what else can you do with promarkers besides colouring in stamps, because colouring in stamps aren't everyone's cup of tea.
So I'll be back soon to show you some more of this....
Wednesday, 16 February 2011
News catch-up
For those of you who are Sassy fans, how would you like to have a say on what Krista produces next? Well pop on over to her blog because she's asking for our input. This is your chance to make suggestions, if there's a stamp you would really like to see. Just click on the pic
Have you also entered the Letraset competition to win 3 blender sets - that's 36 promarkers!! Then check out the post below this for all the info.
Well this is the kids' last day off school - back tomorrow thank goodness, but it's a very short week until the weekend.
Buddy has had a bit of a rummage in the cubbyhole and is having a Tim Holtz-iness clearout, so click on the pic below to enter, as well as some lovely Tim Holtz goodies, Buddy is giving away this beautiful wall hanging - wonder if Kath knows lol
Another of my bloggy buddies, the gorgeous Beckie Dreyer is giving away the most beautiful Rusty Pickle goodies, have a look here
And the last of today's news... the very talented Ali of CAS and Sugar Nellie fame, has fallen out with Mr Blogger, he was messing her around something terrible, so she has defected to Wordpress, you'll find her new blog here. Pop over and see more of her cards like this...
Subscribe to:
Posts (Atom)
New Baby 1
My boss at work, and friend Charlotte recently had her first baby so I had a few baby cards to make, on for Charlotte and her husband James,...
-
This candy is now closed - winner has been announced As promised, I'm here to tempt you with some fabulous candy in celebration of my...
-
Welcome to the Passion For ProMarkers' 1st ever blog hop If you have arrived here from Caryn's blog then you're right on tra...