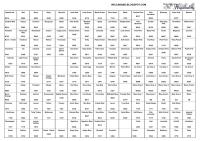
So do you all know about the new Flexmarker colours that Letraset released at the end of 2012? Letraset have expanded the flexmarker range so that it now totals 148 - they've released a lot of colours that have only previously been available as promarkers, so you have a choice depending on personal preference. But there are also 17 brand new colours, some gorgeous new reds, subtle blues, a much needed pink and some zingy purples to mention just a few.
And you know me, I like to play around with colour charts - Letraset already provide downloadable charts for flexmarkers and for promarkers, but for those of us who have both and want them all on the one chart.... I've combined them in a chart that you can download, print and colour yourself.
So here's the link to the post on Wiccababe's Tutorials for all my current charts, there's the one I've been talking about, as well as one for Aquamarkers and a blending suggestion chart for the limited edition 2012 promarkers too.
Debz
x
Showing posts with label How to. Show all posts
Wednesday, 2 January 2013
Friday, 5 October 2012
Madness
Well, yet again things have not gone to plan - I won't bore you, I'll just get on with it.
Letraset have released the last of the 2012 Limited Edition promarker sets this week and they are yummy - pretty frosted pastels.
We have some exciting things coming up this month at Letraset, and we'll be giving some goodies away. You might want to follow my team-mates' blogs so you have more chances to get your hands on the freebies, so here's the links for:
Jessica......Enfys........and Jak.
So this week has been a bit of a blur, Pepsi had her annual health-check and jabs at the vet - she's quite happy to trot into the examination room, but as soon as the door is closed she gets very wary, the vet even got a growl when she gave her the needle.
Then it was Willow's regular hospital appointment, the following day it was Faith's regular appointment for her eyes which resulted in her getting a new prescription for glasses, and finally Willow got a major haircut yesterday. Willow has always had quite long hair, but she has masses of hair, its thick and curly and a complete nightmare to keep. She screams the place down when I wash it or brush it so I had had enough and she had had enough too, so we agreed on a chin length bob......
that's her dad's glasses lol
Debz x
Letraset have released the last of the 2012 Limited Edition promarker sets this week and they are yummy - pretty frosted pastels.
Of course the first thing I did with mine was to complete my LE blending chart, and here's how it looks...
You can download a blank copy from my tutorial page. We have some exciting things coming up this month at Letraset, and we'll be giving some goodies away. You might want to follow my team-mates' blogs so you have more chances to get your hands on the freebies, so here's the links for:
Jessica......Enfys........and Jak.
So this week has been a bit of a blur, Pepsi had her annual health-check and jabs at the vet - she's quite happy to trot into the examination room, but as soon as the door is closed she gets very wary, the vet even got a growl when she gave her the needle.
Then it was Willow's regular hospital appointment, the following day it was Faith's regular appointment for her eyes which resulted in her getting a new prescription for glasses, and finally Willow got a major haircut yesterday. Willow has always had quite long hair, but she has masses of hair, its thick and curly and a complete nightmare to keep. She screams the place down when I wash it or brush it so I had had enough and she had had enough too, so we agreed on a chin length bob......
that's her dad's glasses lol
Debz x
Tuesday, 14 August 2012
Skin Tones
**This is a sticky GIVEAWAY post, please scroll down for more recent news**
The top question I'm asked, here on my blog, at demos and classes, and by email is... "what colours do I use for white/asian/black/indian/mexican skin?"
Well, to be honest that's a little like "how long is a piece of string?" because it's really all to do with personal preference. For instance, for white (caucasian) skin I use Burnt Orange, Coral, Sunkissed Pink and Blush - and when people see how dark the Burnt Orange is, they panic. When I started out with promarkers, over 3 years ago, I used Blush and Ivory. Some girls use Peach, Vanilla, or Satin - it's all down to experimenting and seeing what you like best. I tried lots of combinations betwen starting out and now, but I really like the healthy glow I get with the combo I use nowadays.
But I sat down and decided to work out some colour combos that I like for various skin colours, hopefully this will help you to experiment with colour combos and it's also a great guide for me, so hopefully you'll see more ethnicities being represented on my blog. And I also threw in a bit of a wildcard - you know how I have a bit of a thing for wild hair colours, well I decided to go with a wild skin colour too lol
The top question I'm asked, here on my blog, at demos and classes, and by email is... "what colours do I use for white/asian/black/indian/mexican skin?"
Well, to be honest that's a little like "how long is a piece of string?" because it's really all to do with personal preference. For instance, for white (caucasian) skin I use Burnt Orange, Coral, Sunkissed Pink and Blush - and when people see how dark the Burnt Orange is, they panic. When I started out with promarkers, over 3 years ago, I used Blush and Ivory. Some girls use Peach, Vanilla, or Satin - it's all down to experimenting and seeing what you like best. I tried lots of combinations betwen starting out and now, but I really like the healthy glow I get with the combo I use nowadays.
But I sat down and decided to work out some colour combos that I like for various skin colours, hopefully this will help you to experiment with colour combos and it's also a great guide for me, so hopefully you'll see more ethnicities being represented on my blog. And I also threw in a bit of a wildcard - you know how I have a bit of a thing for wild hair colours, well I decided to go with a wild skin colour too lol
So would you like to see all the colour combos I came up with?
And would you like to win the 11 colours I used for the Black, Asian and Hispanic skin tones?
All you have to do is this.....
- Visit my Skin Tones post on the Letraset blog and leave a comment
- Pop back here and leave a comment telling me which is your favourite, or what colour combos you prefer to use
- Leave your details in the inLinkz below
Giveaway ends 12 noon GMT on Tuesday 14th August
Wednesday, 1 August 2012
Autumn 2012 Limited Edition Colours
Hiya,
I managed to squeeze in a quick half hour playing with the new colours - I was going to make up a colour chart like I did with the Spring and Summer limited edition colours. But I got a bit carried away and decided to make up a printable chart that anyone can use.
You can download both versions of my chart from the Tutorial page here.
Thanks for visiting,
I appreciate any comments
Debz x
I managed to squeeze in a quick half hour playing with the new colours - I was going to make up a colour chart like I did with the Spring and Summer limited edition colours. But I got a bit carried away and decided to make up a printable chart that anyone can use.
You can download both versions of my chart from the Tutorial page here.
Thanks for visiting,
I appreciate any comments
Debz x
Wednesday, 2 May 2012
Summer 2012 Limited Edition Colours
Well I'm sure you've all heard by now that Letraset have released the Summer 2012 Limited Edition pack - these will only be produced for a limited time, and when the stock is gone they will never make these colours again.
And wow - what gorgeous, tangy summery colours they are..
My ones arrived yesterday so I had a quick play around with them just to see how yummy these colours are. And just like I did with the Spring colours, I've put together a wee chart to show where these Limited Edition colours fit in with your existing promarkers...
If you want to see the equivalent Spring chart, you can find it here.
Now, I need to get cracking with a lovely summery project to show them off :)
Thanks for visiting,
I appreciate any comments
Debz x
And wow - what gorgeous, tangy summery colours they are..
My ones arrived yesterday so I had a quick play around with them just to see how yummy these colours are. And just like I did with the Spring colours, I've put together a wee chart to show where these Limited Edition colours fit in with your existing promarkers...
If you want to see the equivalent Spring chart, you can find it here.
Now, I need to get cracking with a lovely summery project to show them off :)
Thanks for visiting,
I appreciate any comments
Debz x
Sunday, 4 March 2012
Updated White Skin and Brunette Hair Tutorial
To begin with I have printed my digital stamp (Making Valentines from Saturated Canary) onto smooth white cardstock (Diamond White from The Papeterie)
I will be using Burnt Orange and Coral promarkers and Sunkissed Pink and Blush Flexmarkers for the skin.
The first colour I use is Burnt Orange (with an ultra fine nib fitted), this looks very dark – but it is toned down with the blending as we go along – it gives the skin a nice healthy glow. I’ve very lightly coloured underneath the hairline around the top and sides of the face.
Using the bullet nib of the Coral promarker I have coloured over the Burnt Orange areas then moved slightly further out into the white areas of the face. I use small circular strokes. By colouring over the darker shade, I’m blending as I go.
Repeat the last step using the Sunkissed Pink flexmarker (you can use the promarker instead), again colouring over the already coloured areas and slightly further into the white area of the face. I have also made a few light strokes to accentuate the contours of her face e.g. her nose. Remember to be a little lighter-handed with the Flexmarkers as they are slightly juicier than the Promarkers.
And to finish off her face I have coloured over the Sunkissed Pink area and the remaining white areas with the Blush flexmarker (again you can use the promarker instead). It does look a little dark in the photo, but take my word for it, it dries lighter.
For her hair I will be using Black Flexmarker, Walnut, Cocoa and Cinnamon promarkers (all with ultra fine nibs fitted)
Firstly I use the Black flexmarker and very lightly lay down a little colour at the centre parting. (don't be too heavy handed with the black - the more ink you lay down, the more it takes to blend it out)
Next I used the Walnut promarker with the ultra fine nib fitted to make light wispy strokes over and outwards from the parting and inwards from each side. I find the quicker I do this, the more random the lines are – for a more natural effect.
Repeat this process with the Cocoa promarker with ultra fine nib fitted, moving further into the uncoloured area of the hair.
Then colour, lightly over the whole hair area with the Cinnamon promarker (bullet nib). You can repeat the steps with the Walnut and Cocoa promarkers if you think the hair needs more depth or definition
Next I have coloured the rest of her hair, her eyes (using Walnut, Cocoa and Cinnamon promarkers with the ultra fine nibs attached) I coloured her lips with Coral and Burnt Orange promarkers (with ultra fine nib attachments) leaving a tiny bit uncoloured in the middle as a highlight.
You can find the rest of this tutorial, for the clothing and hearts on the Letraset Blog, and here's is my finished Valentine gift box....
I appreciate any comments
Debz x
Thursday, 26 January 2012
Limited Edition Spring Promarkers
yup, that's right, just in case you haven't seen the posts on the Letraset blog, or the tweets, or the Letraset Facebook page lately, Letraset are releasing 6 limited edition brand spanking new colours.
And because they are only going to be available during Spring 2012 they have fabulous spring names. This new pack of 6 promarkers will be released in Feb 2012 and when the stock runs out they will be gone forever - so if you have promarkers already or were thinking of trying them, then this set is an absolute must. In fact, why not get 2 :)
This set includes some lovely fresh, subtle tones that will blend perfectly with the existing promarker and flexmarker collection.
The question I'm most often asked when Letraset release new colours is... "where do they fit into the existing promarker collection?" So to take a little of the guesswork out of it for you I have tried to show this for you...
This is my take on where the new colours fit in and also gives you an idea of colours that may blend well. You'll find more info on the Letraset blog.
Thanks for visiting, I appreciate any comments Debz x
And because they are only going to be available during Spring 2012 they have fabulous spring names. This new pack of 6 promarkers will be released in Feb 2012 and when the stock runs out they will be gone forever - so if you have promarkers already or were thinking of trying them, then this set is an absolute must. In fact, why not get 2 :)
This set includes some lovely fresh, subtle tones that will blend perfectly with the existing promarker and flexmarker collection.
The question I'm most often asked when Letraset release new colours is... "where do they fit into the existing promarker collection?" So to take a little of the guesswork out of it for you I have tried to show this for you...
This is my take on where the new colours fit in and also gives you an idea of colours that may blend well. You'll find more info on the Letraset blog.
Thanks for visiting, I appreciate any comments Debz x
Friday, 23 December 2011
Flexmarkers - basic skin and hair tutorial
This is a sticky post - please scroll down for more recent posts
As promised, I'm back with a quick video tutorial showing how I use flexmarkers. For those of you who are used to working with promarkers, I find that you have to be much lighter with your handling of the flexmarkers and hopefully you can see that on the video. I've kept it brief, I know there's nothing more boring than a video that goes on and on, so I have not been too fussy or fernickity.
Because I really appreciate all of you watching and reading my tutorials, and for all the fabulous feedback and suggestions I get I'd like to share a wee something..
Courtesy of the very generous folks at Letraset I have a set of the flexmarkers that I used in the video. I will send the winner one each of: Rose Peach, Sunkissed Pink, Blush, Nutmeg, Light Fawn and Buttercup flexmarkers
So all you have to do to be in with a chance of winning is
As promised, I'm back with a quick video tutorial showing how I use flexmarkers. For those of you who are used to working with promarkers, I find that you have to be much lighter with your handling of the flexmarkers and hopefully you can see that on the video. I've kept it brief, I know there's nothing more boring than a video that goes on and on, so I have not been too fussy or fernickity.
Because I really appreciate all of you watching and reading my tutorials, and for all the fabulous feedback and suggestions I get I'd like to share a wee something..
Courtesy of the very generous folks at Letraset I have a set of the flexmarkers that I used in the video. I will send the winner one each of: Rose Peach, Sunkissed Pink, Blush, Nutmeg, Light Fawn and Buttercup flexmarkers
So all you have to do to be in with a chance of winning is
- copy the pic above and post to your sidebar with a link to this post
- enter your details in the Inlinkz below
This candy will close at 12 noon GMT on Friday 23rd December.
Tuesday, 30 August 2011
Adding Flexmarkers
The lovely Fiona and Cathy asked me if I could put together one of my blank colour charts to include the new Flexmarkers from Letraset, so of course I'm only too happy to oblige.
Flexmarkers will be available in 72 colours, BUT if you already have all the promarkers you would only need to add 51 of those 72 colours to your collection as 21 of the flexmarker colours are already available as promarkers
(in case you were wondering, those 21 colours are: Berry Red, Sandstone, Mandarin, Pumpkin, Blush, Sunflower, Canary, Buttercup, Bright Green, Meadow Green, Apple, Forest Green, Grass, Cool Aqua, Duck Egg, Cyan, Pale Pink, Pastel Pink, Dusky Pink, Sunkissed Pink and Black)
So I have added the 51 new colours to the blank promarker chart that I made up a while ago.

So all you have to do is click on the above pic which will take you to the 4shared website where you will be able to download the chart.
I highly recommend that you print the colour chart out onto the cardstock that you normally use with your flexmarkers and/or promarkers, then colour it in :) - this way it serves as a true representation of the colours for you and it also doubles up as an at-a-glance checklist.
Please feel free to download my chart, but note it is only for personal use, DO NOT pass it off as your own or sell it or pass it on to others - I would appreciate it if you just pointed people to this post, or to my tutorial page where it is available to download.
Another wee tip for you - once your chart is all coloured in, it's worth having it laminated to save it getting tatty :)
Flexmarkers will be available in 72 colours, BUT if you already have all the promarkers you would only need to add 51 of those 72 colours to your collection as 21 of the flexmarker colours are already available as promarkers
(in case you were wondering, those 21 colours are: Berry Red, Sandstone, Mandarin, Pumpkin, Blush, Sunflower, Canary, Buttercup, Bright Green, Meadow Green, Apple, Forest Green, Grass, Cool Aqua, Duck Egg, Cyan, Pale Pink, Pastel Pink, Dusky Pink, Sunkissed Pink and Black)
So I have added the 51 new colours to the blank promarker chart that I made up a while ago.
So all you have to do is click on the above pic which will take you to the 4shared website where you will be able to download the chart.
I highly recommend that you print the colour chart out onto the cardstock that you normally use with your flexmarkers and/or promarkers, then colour it in :) - this way it serves as a true representation of the colours for you and it also doubles up as an at-a-glance checklist.
Please feel free to download my chart, but note it is only for personal use, DO NOT pass it off as your own or sell it or pass it on to others - I would appreciate it if you just pointed people to this post, or to my tutorial page where it is available to download.
Another wee tip for you - once your chart is all coloured in, it's worth having it laminated to save it getting tatty :)
Monday, 18 July 2011
More Ultra Fine Nibs Tips
Now that I've had more time to play around with these fantastic new Ultra Fine Nibs for the Letraset Promarkers, I've come across some hints and tips that I thought I'd pass on.
Now, one question I'm asked a lot about these new tips is "do I need a nib for every pen?" well there's not a straight-forward answer to that one..... Letraset recommend that you use 1 nib for 1 pen, and if you only have a few promarkers then that's great, but for those of us who have more than just a few then that's quite a lot of nibs we're going to have to buy. So here is my solution to save a little money and/or space out those nib purchases.... I work from dark to light when I'm colouring, and most of the time (although there are exceptions to this rule) the smaller areas that need colouring would be the areas I would be colouring with my darkest shade of whichever colour family I am using at the time.
For instance, if I was colouring brunette hair, I would be using Walnut, Cocoa, Cinnamon, Tan and Almond (Walnut is my darkest shade here). I would probably be using Walnut at the roots, behind the head and at the tips - which are most likely to be the fiddliest areas to colour. So working on this theory it would be quite cost-effective to buy nibs for (for instance) 1 dark brown, 1 dark pink, 1 dark blue, 1 dark green etc etc or whichever colour combinations you use most.
It is possible to swap your nibs around on different pens - however you need to be aware that you'll have to scribble a little with the nib to flush the old colour from the nib and to let the new colour wick through - my advice would be to stick to the same colour family though.
So what else can these Ultra Fine Nibs do? well, for those of you who use your blender pen to introduce a bit of texture in your colouring then think of the possibilities with a fine nib - here are a few examples...
I have roughly coloured the dragon's skin with Olive and Pear Greens (Image is Draco the dragon from Whiff of Joy)
I used the normal bullet tip of the blender pen to create texture on the upper, lighter area by simply touching the nib to the paper for a second and repeating this all over. I then clicked the Ultra Fine Nib over the bullet tip of the blender pen, waited a few seconds for the blender fluid to flow and then repeated the touching of the tip to the paper on the belly area- you can see that the dots are far smaller and finer.
You could use your blender pen with ultra fine nib to create loads of different effects - give it a try, and I'd love to see how you get on. Why not try wee lines, doodles or patterns?
The nibs are also ideal for doodling, faux-stitching, writing etc, you are now no longer restricted to using just a black fine-liner, you can have any colour you wish :)
Now, one question I'm asked a lot about these new tips is "do I need a nib for every pen?" well there's not a straight-forward answer to that one..... Letraset recommend that you use 1 nib for 1 pen, and if you only have a few promarkers then that's great, but for those of us who have more than just a few then that's quite a lot of nibs we're going to have to buy. So here is my solution to save a little money and/or space out those nib purchases.... I work from dark to light when I'm colouring, and most of the time (although there are exceptions to this rule) the smaller areas that need colouring would be the areas I would be colouring with my darkest shade of whichever colour family I am using at the time.
For instance, if I was colouring brunette hair, I would be using Walnut, Cocoa, Cinnamon, Tan and Almond (Walnut is my darkest shade here). I would probably be using Walnut at the roots, behind the head and at the tips - which are most likely to be the fiddliest areas to colour. So working on this theory it would be quite cost-effective to buy nibs for (for instance) 1 dark brown, 1 dark pink, 1 dark blue, 1 dark green etc etc or whichever colour combinations you use most.
It is possible to swap your nibs around on different pens - however you need to be aware that you'll have to scribble a little with the nib to flush the old colour from the nib and to let the new colour wick through - my advice would be to stick to the same colour family though.
So what else can these Ultra Fine Nibs do? well, for those of you who use your blender pen to introduce a bit of texture in your colouring then think of the possibilities with a fine nib - here are a few examples...
I have roughly coloured the dragon's skin with Olive and Pear Greens (Image is Draco the dragon from Whiff of Joy)
I used the normal bullet tip of the blender pen to create texture on the upper, lighter area by simply touching the nib to the paper for a second and repeating this all over. I then clicked the Ultra Fine Nib over the bullet tip of the blender pen, waited a few seconds for the blender fluid to flow and then repeated the touching of the tip to the paper on the belly area- you can see that the dots are far smaller and finer.
You could use your blender pen with ultra fine nib to create loads of different effects - give it a try, and I'd love to see how you get on. Why not try wee lines, doodles or patterns?
The nibs are also ideal for doodling, faux-stitching, writing etc, you are now no longer restricted to using just a black fine-liner, you can have any colour you wish :)
Wednesday, 13 July 2011
Promarker Storage - version 3
Hi again, I've made a great discovery and now that I've checked it out (on your behalf of course) I can share it with you... I've been trying to find an affordable solution for storing promarkers. Now I am a very very lucky girl and have 2 complete sets of promarkers, 1 set that comes with me to demonstrations and classes and another set that stays at home for my personal use.
Up until now the second set has been in a big cardboard box until I found a suitable desktop storage solution, but today I have found the answer!
You can buy this here. It's being sold as storage for Touché markers, but it works for Promarkers, Trias and probably other types of markers too. And the best bit, in my opinion the price is £12 + VAT + p&p - fabulous value for money.
Now that I have it in my possession I can tell you that it's very sturdy, the outer carcass is 12mm thick mdf with removable partitions. You can of course decorate it to suit your craft space too
- I will get round to this eventually.
So here's what it looks like with promarkers in-situ (as well as a few sneaky trias)
As you can see, it's plenty deep enough for the promarkers, and even with the ultra-fine nibs fitted, they wouldn't jut out very far.
Just hope I have time soon to decorate it :)
Up until now the second set has been in a big cardboard box until I found a suitable desktop storage solution, but today I have found the answer!
You can buy this here. It's being sold as storage for Touché markers, but it works for Promarkers, Trias and probably other types of markers too. And the best bit, in my opinion the price is £12 + VAT + p&p - fabulous value for money.
Now that I have it in my possession I can tell you that it's very sturdy, the outer carcass is 12mm thick mdf with removable partitions. You can of course decorate it to suit your craft space too
- I will get round to this eventually.
So here's what it looks like with promarkers in-situ (as well as a few sneaky trias)
As you can see, it's plenty deep enough for the promarkers, and even with the ultra-fine nibs fitted, they wouldn't jut out very far.
Just hope I have time soon to decorate it :)
Saturday, 19 March 2011
Simple Hair Tutorial - Blondes
I'm updating all my promarker tutorials and today it's the turn of blonde hair. Now I have done 3 different versions that are all slighly different depending on what kind of blonde you prefer. All 3 versions use only 3 colours though so are nice and easy.
I have used: Strawberry Patch rubber stamp from Sugar Nellie, Memento ink pad and Stampin' Up whisper white card stock throughout.
Blonde 1
I have started out lightly colouring the areas I imagine would be darkest with Cinnamon
I then colour over the Cinnamon, and further into the white areas with Saffron - colouring over the darker shade helps to blend the 2 shades together
Lastly I colour over the 2 previous shades and further out into the white areas with Vanilla - I have left some of the white areas uncoloured where the light would be reflected. These colours give a soft honey blonde effect.
Blonde 2
We're starting a bit darker this time, and colouring the darkest areas with Cocoa - I'm going to be using the same technique for each of the 3 different blondes, just changing the colours I've used.
Colour over the Cocoa and outwards onto the white areas with Pastel Yellow, you don't need to be heavy handed, just repeat until you're happy with the effect.
And lastly I have coloured over the last 2 shades and outwards into the white areas with Buttercup - again I have left a little of the white areas uncoloured - but if you want a smoother look you could colour over all of the hair with a pale shade like Ivory. These colours give a much brighter, bolder blonde than the first one.
Blonde 3
For my 3rd version we'll start off colouring the darkest areas with Caramel - there's no need to lay down a lot of colour (the more colour you lay down, the more ink you will use to try and blend the colours).
The mid tone I've used this time is Sandstone, and I have lightly covered over the Caramel areas and outwards in the uncoloured areas of the hair a little.
And lastly I have coloured over the 2 darker tones and outwards into the white with Buttercup - again leaving some white areas uncoloured.
This is a cooler blonde compared to the other two.
But you don't have to stick to these colours at all - the trick is to experiment with colours, if it doesn't work out then it's only a piece of paper that has to go in the bin. If you come up with a colour combination that you like, please come and let me know - it's always interesting to see what other people use.
I have used: Strawberry Patch rubber stamp from Sugar Nellie, Memento ink pad and Stampin' Up whisper white card stock throughout.
Blonde 1
I have started out lightly colouring the areas I imagine would be darkest with Cinnamon
I then colour over the Cinnamon, and further into the white areas with Saffron - colouring over the darker shade helps to blend the 2 shades together
Lastly I colour over the 2 previous shades and further out into the white areas with Vanilla - I have left some of the white areas uncoloured where the light would be reflected. These colours give a soft honey blonde effect.
Blonde 2
We're starting a bit darker this time, and colouring the darkest areas with Cocoa - I'm going to be using the same technique for each of the 3 different blondes, just changing the colours I've used.
Colour over the Cocoa and outwards onto the white areas with Pastel Yellow, you don't need to be heavy handed, just repeat until you're happy with the effect.
And lastly I have coloured over the last 2 shades and outwards into the white areas with Buttercup - again I have left a little of the white areas uncoloured - but if you want a smoother look you could colour over all of the hair with a pale shade like Ivory. These colours give a much brighter, bolder blonde than the first one.
Blonde 3
For my 3rd version we'll start off colouring the darkest areas with Caramel - there's no need to lay down a lot of colour (the more colour you lay down, the more ink you will use to try and blend the colours).
The mid tone I've used this time is Sandstone, and I have lightly covered over the Caramel areas and outwards in the uncoloured areas of the hair a little.
And lastly I have coloured over the 2 darker tones and outwards into the white with Buttercup - again leaving some white areas uncoloured.
This is a cooler blonde compared to the other two.
But you don't have to stick to these colours at all - the trick is to experiment with colours, if it doesn't work out then it's only a piece of paper that has to go in the bin. If you come up with a colour combination that you like, please come and let me know - it's always interesting to see what other people use.
Subscribe to:
Posts (Atom)
New Baby 1
My boss at work, and friend Charlotte recently had her first baby so I had a few baby cards to make, on for Charlotte and her husband James,...
-
Welcome to the Passion For ProMarkers' 1st ever blog hop If you have arrived here from Caryn's blog then you're right on tra...
-
This candy is now closed - winner has been announced As promised, I'm here to tempt you with some fabulous candy in celebration of my...


.jpg)