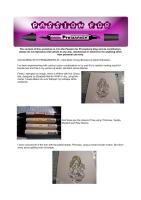
I've been experimenting with various colour combinations to try and find a realistic looking result for blonde hair and this is my version of what I call Dark Honey Blonde.
Firstly I stamped my image, which is Willow with Hot Chocolate, designed by Elisabeth Bell for Whiff of Joy, using Memento Tuxedo Black ink onto Stampin' Up whisper white cardstock.
And these are the colours I'll be using: Primrose, Vanilla, Mustard and Raw Sienna
I have coloured all of the hair with the palest shade: Primrose, using a small circular motion. But don't worry about getting even coverage.
Then I take the Mustard, and using tiny, light strokes I colour areas which I imagine wouldn't be highlighted. I don't lay down much colour at this stage as its easier to add more colour than take it away. (sorry for the blurry pic) You can see that I have left certain areas Primrose, this is where I imagine the light source would be hitting her hair.
Next, using short, light strokes I added Raw Sienna to the roots and tips of the hair and to areas that would be darkest.
Then I used the Vanilla in a small circular movement to blend the Raw Sienna towards the paler areas. Don't worry too much about being to accurate at this point as you'll probably want to add more colour for more depth.
I have added more Raw Sienna to the same areas as before, this gives the hair colour more depth and movement.
And again, I used the Vanilla to blend it and soften the hard lines
You can keep adding more Raw Sienna and/or Mustard then blend with Vanilla until you're happy with the colour. You can also add white gel pen to accentuate the palest areas if you wish.
And this is my finished image
To download this tutorial, click this icon


4 comments:
Brilliant tutorial Debbi, I've not used my raw sienna much, so i'm really pleased to see a colour combination to use it with, time for me to go blonde i think :)
Have a great day, hope the rain stops
Suzi
xxx
Thanks Debbi, this is really helpful :)
Hugs
Anne
Thank you so much for this! I'm going to bookmark it for future reference.
Debbi, your tutorial is wonderful! I have the hardest time deciding "where the light source is coming from" so I am even more envious of your talent now than I was before!
Post a Comment